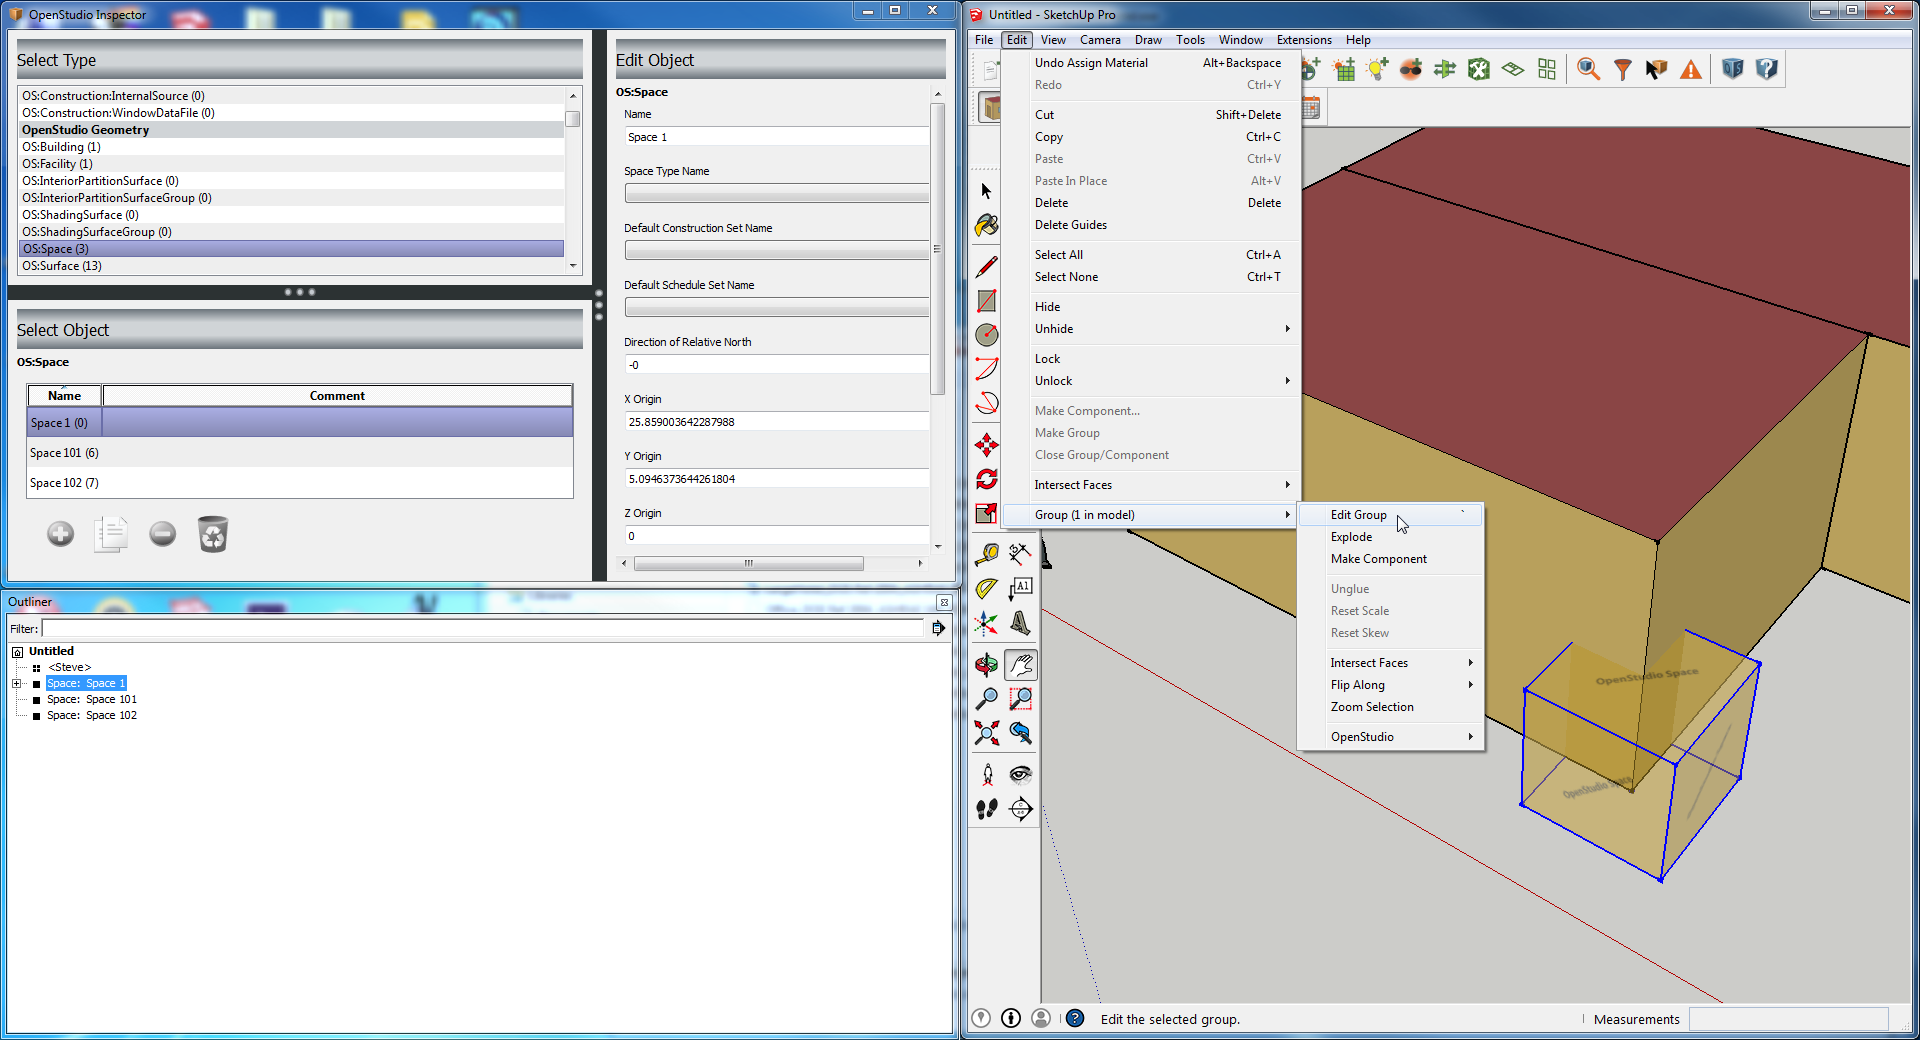
When you make a new zone in the legacy plugin, or a new space in older versions of the new OpenStudio the only geometry made is a little tick mark. Typically you can double click that tick mark to get into the space, but that can be very tough to do if the tick mark overlaps with the edge of another space as shown in the screenshot below.
Now in newer version of OpenStudio we make a place holder box when you make a new space. The first time you enter into the space that place holder gets thrown away, but ideally you are making new geometry that will aid in selecting the space the next time you want to come back to it. You can see this on the right side of the screenshot.
Lets assume the place holder doesn't exist and you wan to select a space/zone. If you are comfortable with SketchUp's selection tool you can draw a window around the zone/space to select it, but it can be tricky to make sure you don't also select other objects. A sure way to do this is to open the outliner window which is native to SketchUp, and can be found under the "window" menu. This is shown in the bottom left of the screenshot. You can select the desired space/zone, and then either right click over the zone in the outliner or use the "edit" menu to get to "Edit Group" as shown in the right side of the screenshot. Once you choose "Edit Group" you can draw space/zone geometry.
Note, if you are using the newer OpenStudio you can also use the OpenStudio inspector to select a space in addition to using the Outliner window. Either way make sure you don't keep the outliner window up unless you need it. It is a resource hog which is very bad for any batch operations or when opening models.


