Question-and-Answer Resource for the Building Energy Modeling Community
| | 1 | initial version |
Yes. You have to remove the piercing geometries. In EnergyPlus/OpenStudio every interior boundary has to has to be made up of two co-planar surfaces from two different spaces. When you are piercing through one space with another, you aren't satisfying this condition. It will cause incorrect intersecting and surface matching when using the OS routine. As for the fix, see the following...
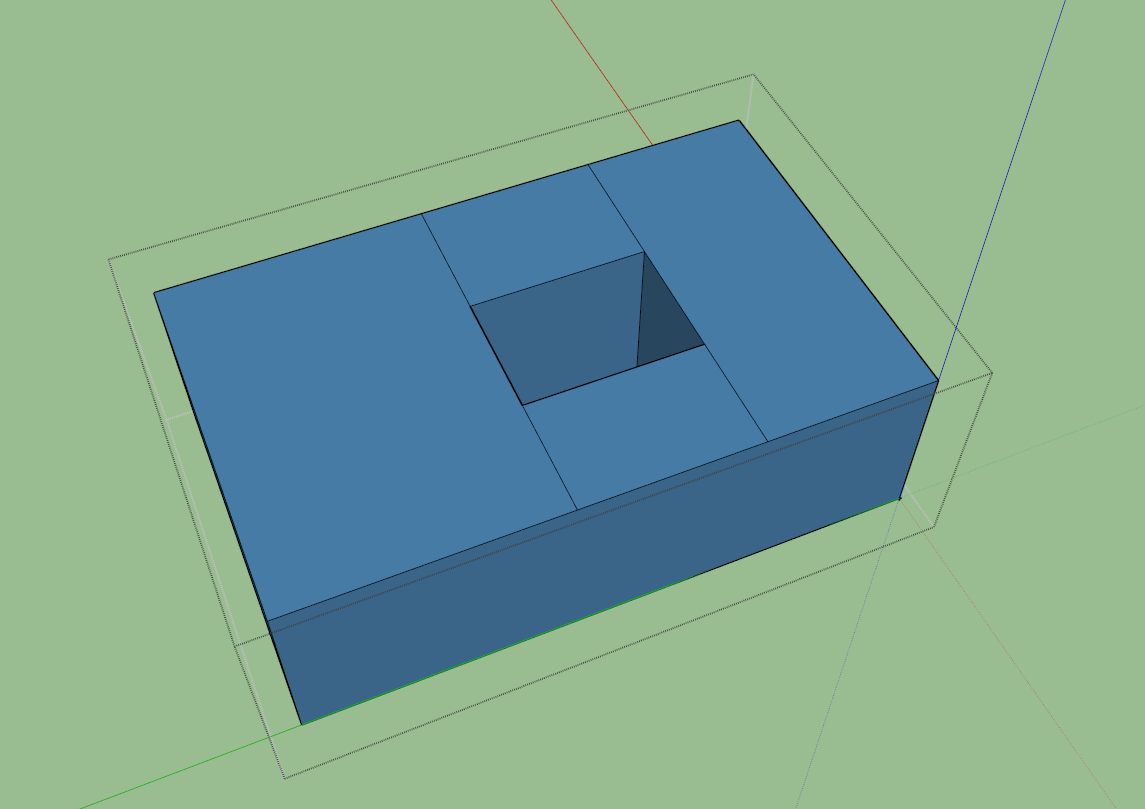
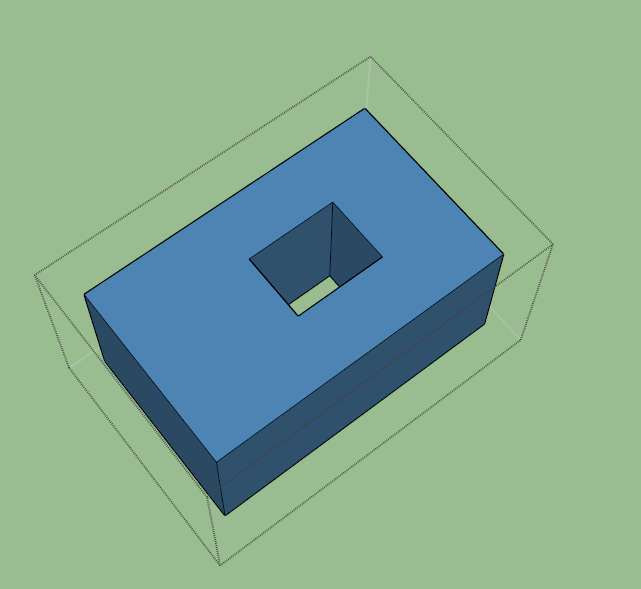
Here I have made a small mockup of what I think represents your problem. Observe the exterior bounded surfaces that should be interior.
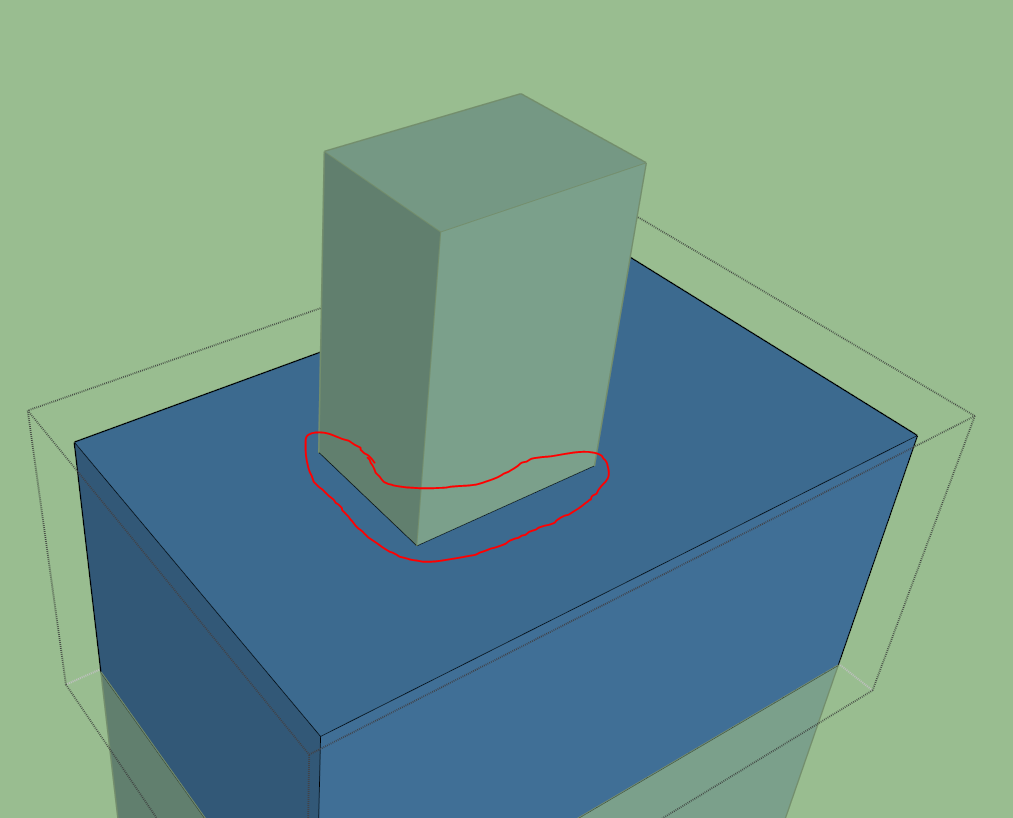
Enter into the space where you'd like the hollow center and trace with the pencil where the piercing geometry intersects the plane of your active space. Do this on both the ceiling and floor surfaces of the space (I've only shown the ceiling).
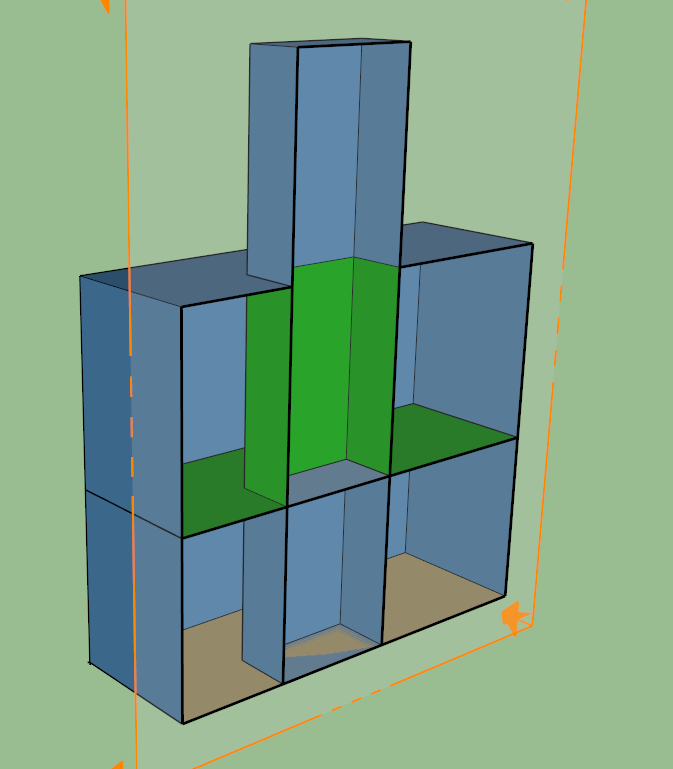
Now in x-ray view in the same space of interest, draw lines the with pencil tool again connecting the four corners of the ceiling and floor rectangles to create walls. You should have something to the following effect.
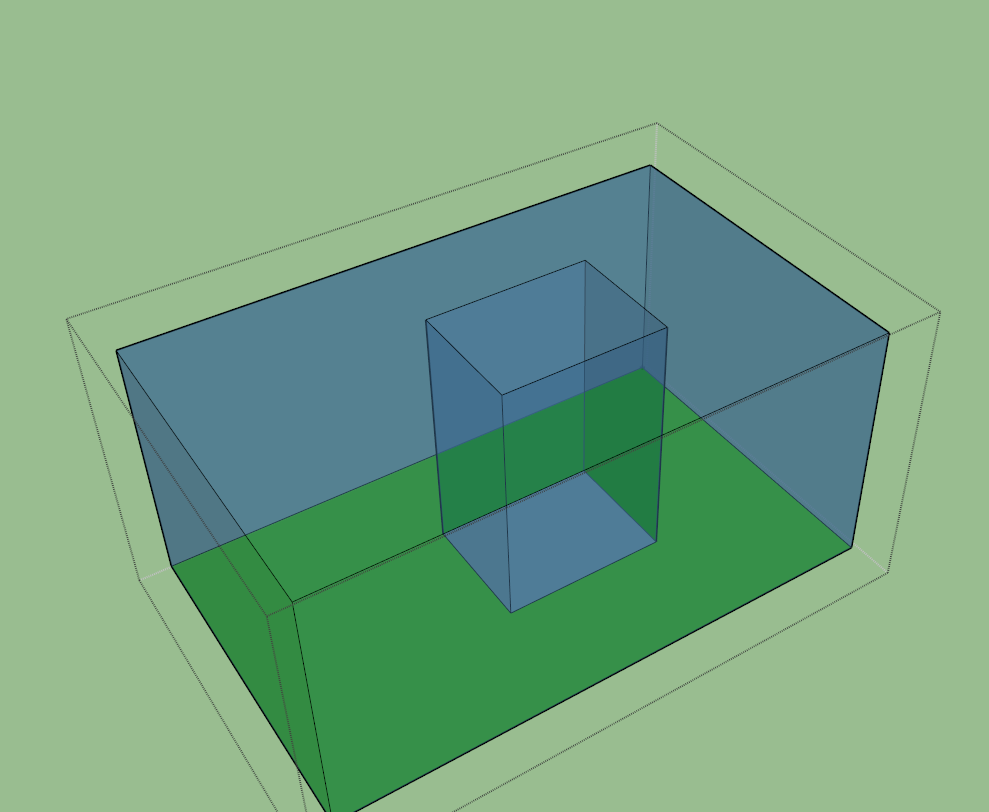
Delete the two rectangles and BAM, hollowed out space.
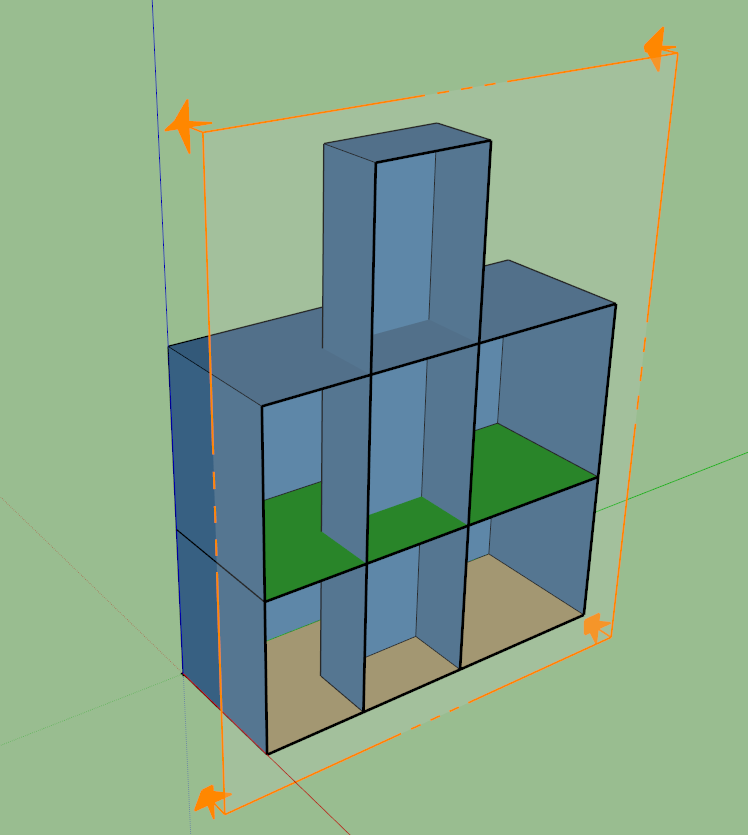
A quick intersect and surface match operation reveals our success. Note that I only did the top space, You can still see the errors in the bottom space.
Hope that answers your question.
| | 2 | No.2 Revision |
Yes. You have to remove the piercing geometries. In EnergyPlus/OpenStudio every interior boundary has to has to be made up of two co-planar surfaces from two different spaces. When you are piercing through one space with another, you aren't satisfying this condition. It will cause incorrect intersecting and surface matching when using the OS routine. As for the fix, see the following...
Here I have made a small mockup of what I think represents your problem. Observe the exterior bounded surfaces that should be interior.
Enter into the space where you'd like the hollow center and trace with the pencil where the piercing geometry intersects the plane of your active space. Do this on both the ceiling and floor surfaces of the space (I've only shown the ceiling).
Now in x-ray view in the same space of interest, draw lines the with pencil tool again connecting the four corners of the ceiling and floor rectangles to create walls. You should have something to the following effect.
Delete the two rectangles and BAM, hollowed out space.
A quick intersect and surface match operation reveals our success. Note that I only did the top space, You can still see the errors in the bottom space.
Hope that answers your question.
| | 3 | No.3 Revision |
Yes. You have to remove the piercing geometries. In EnergyPlus/OpenStudio every interior boundary has to be made up of two co-planar surfaces from two different spaces. When you are piercing through one space with another, you aren't satisfying this condition. It will cause incorrect intersecting and surface matching when using the OS routine. As for the fix, see the following...
Here I have made a small mockup of what I think represents your problem. Observe the exterior bounded surfaces that should be interior.
Enter into the space where you'd like the hollow center and trace with the pencil where the piercing geometry intersects the plane of your active space. Do this on both the ceiling and floor surfaces of the space (I've only shown the ceiling).
Now in x-ray view in the same space of interest, draw lines the with pencil tool again connecting the four corners of the ceiling and floor rectangles to create walls. You should have something to the following effect.
Delete the two rectangles and BAM, hollowed out space.
A quick intersect and surface match operation reveals our success. Note that I only did the top space, You can still see the errors in the bottom space.
Hope that answers your question.
EDIT: You'll need to add additional lines to ensure that every surface is "closed". I like to keep all my surfaces square, so I commonly take the approach seen in the following graphic. Or as David suggests in the comment, corner to corner would also work.