To model radiant floors in OpenStudio, you will need to go through the following steps:
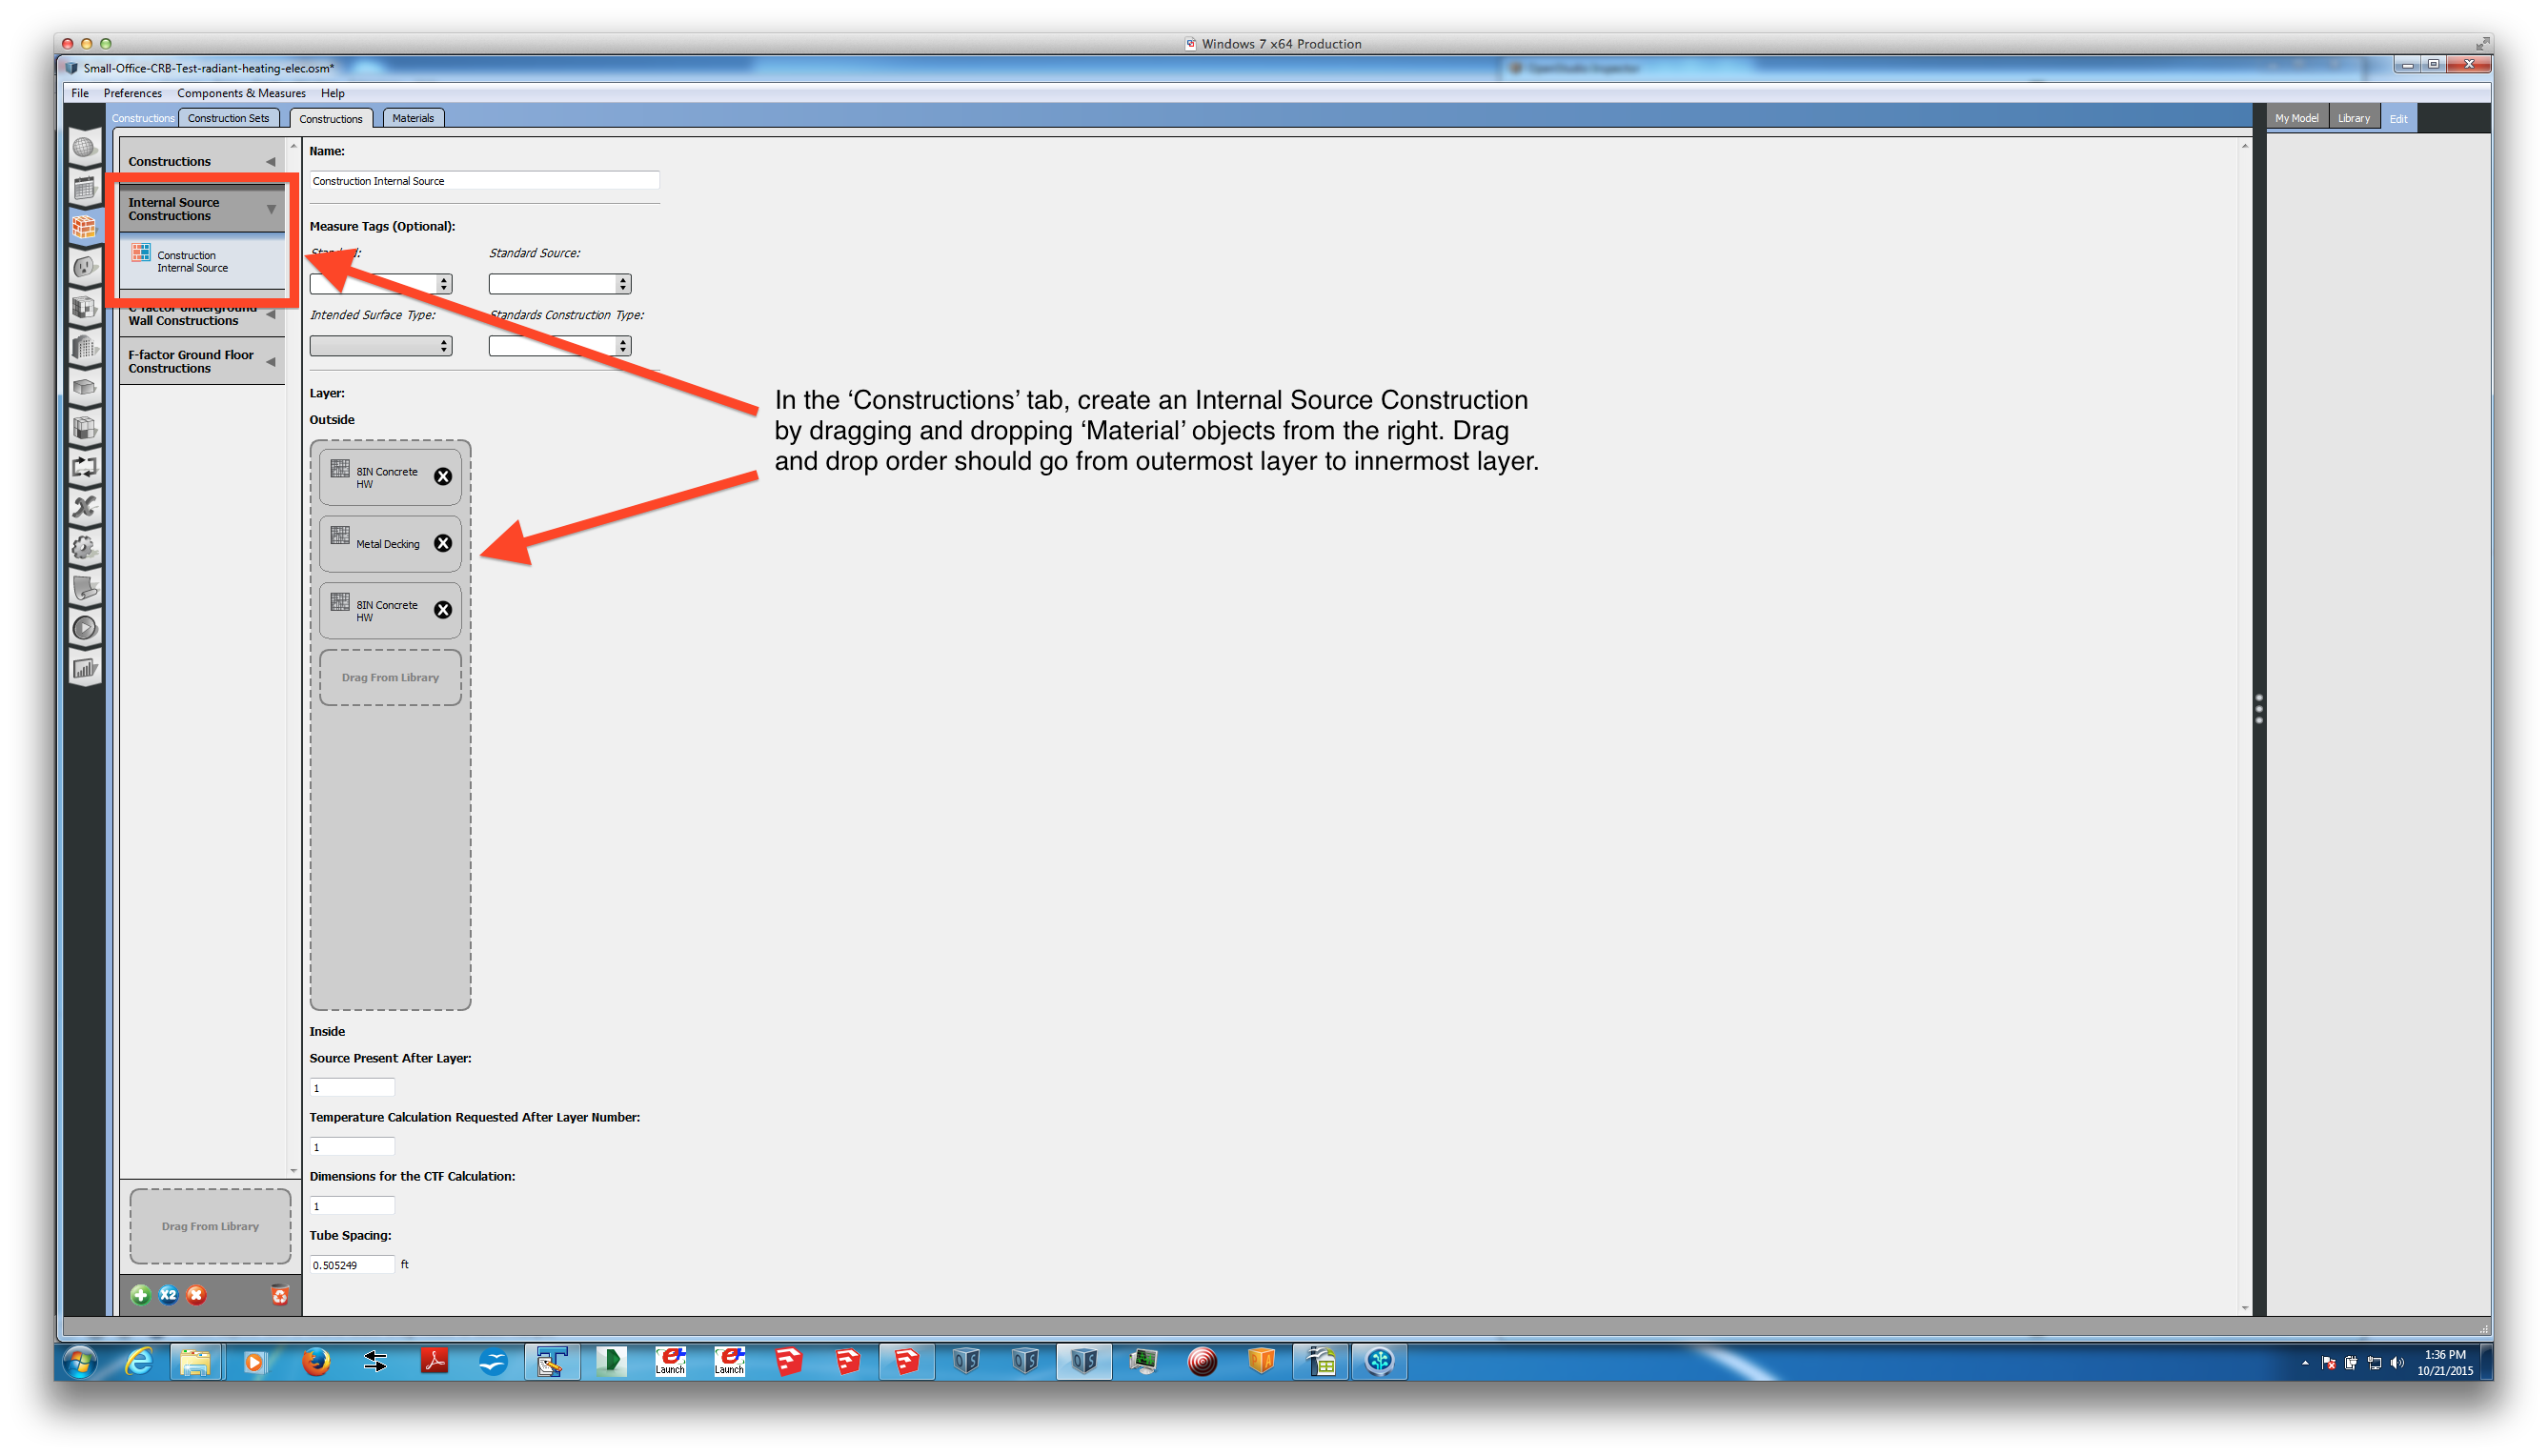
- Create an 'Internal Source Construction' for the radiant floor assembly. You can do this in the 'Constructions' tab near the top on the left side of the OpenStudio interface. It should be noted that this internal source construction MUST contain at least three material layers, otherwise EnergyPlus will crash during the simulation.
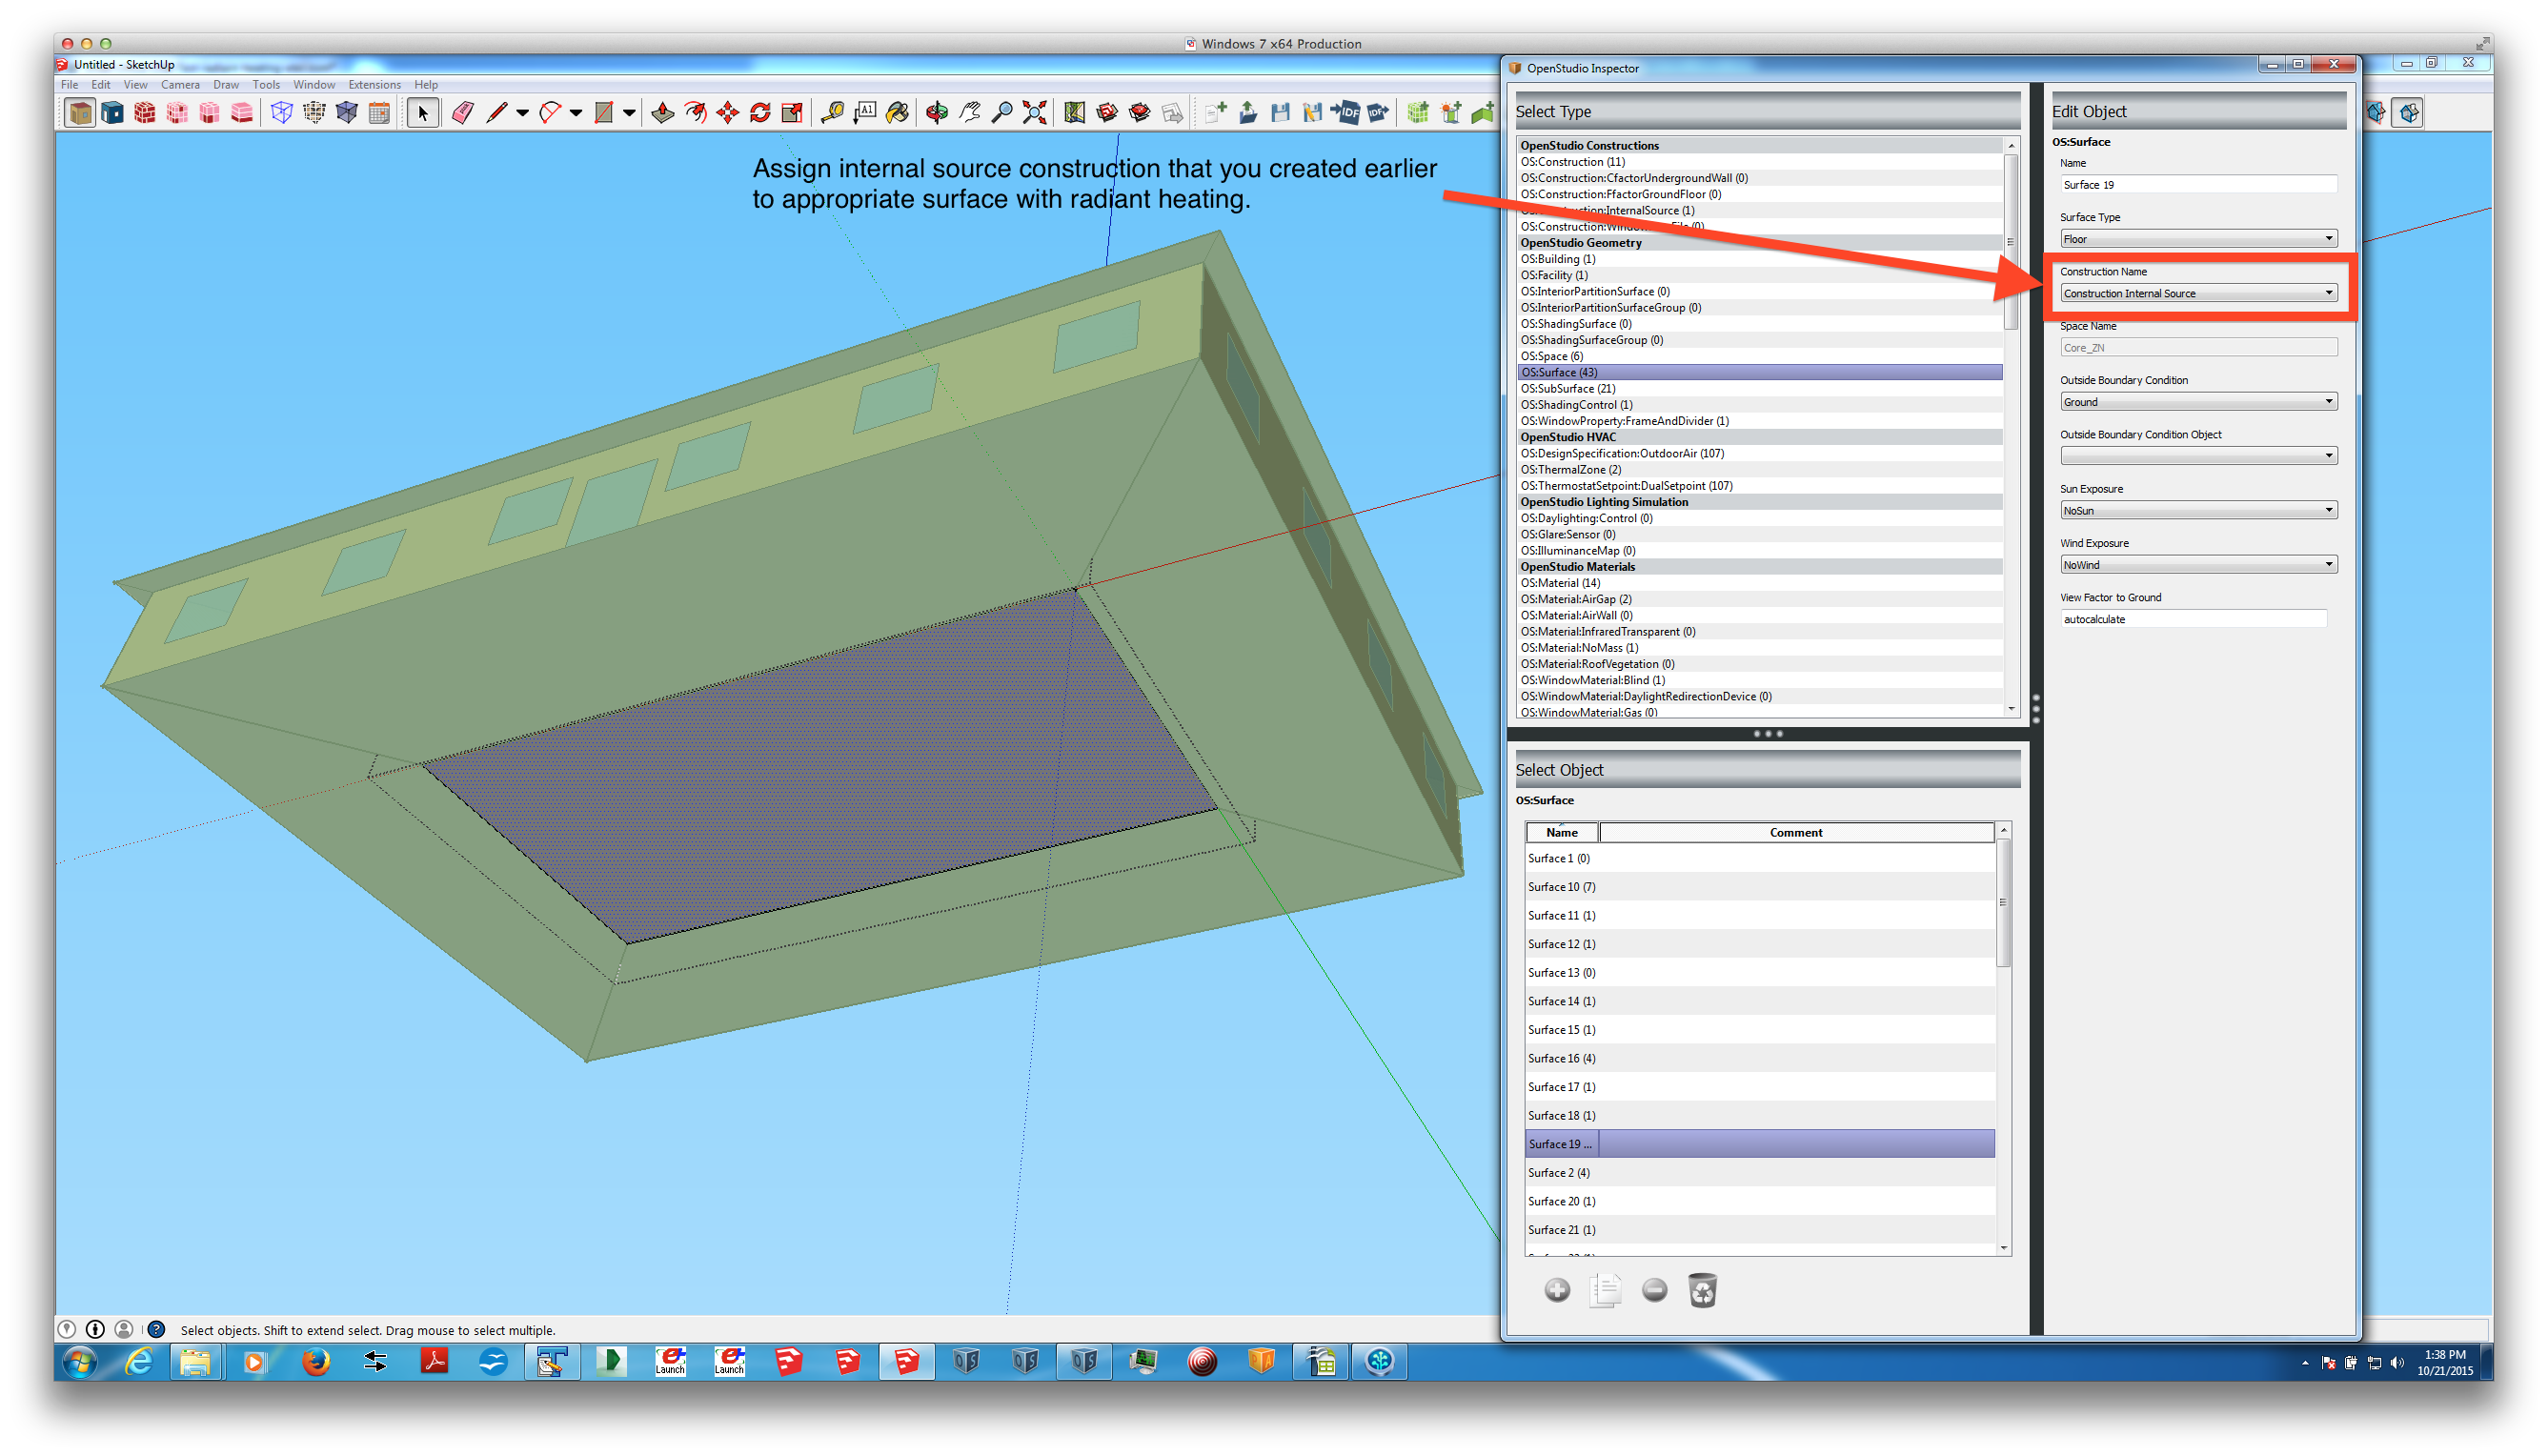
- Assign the new internal source construction to the appropriate floor surface(s) of your model. The most direct way to do this is in the SketchUp plug-in, since you can see the surface. Setting the 'Construction Name' field of the surface will override the default construction set assignment for floor surfaces.
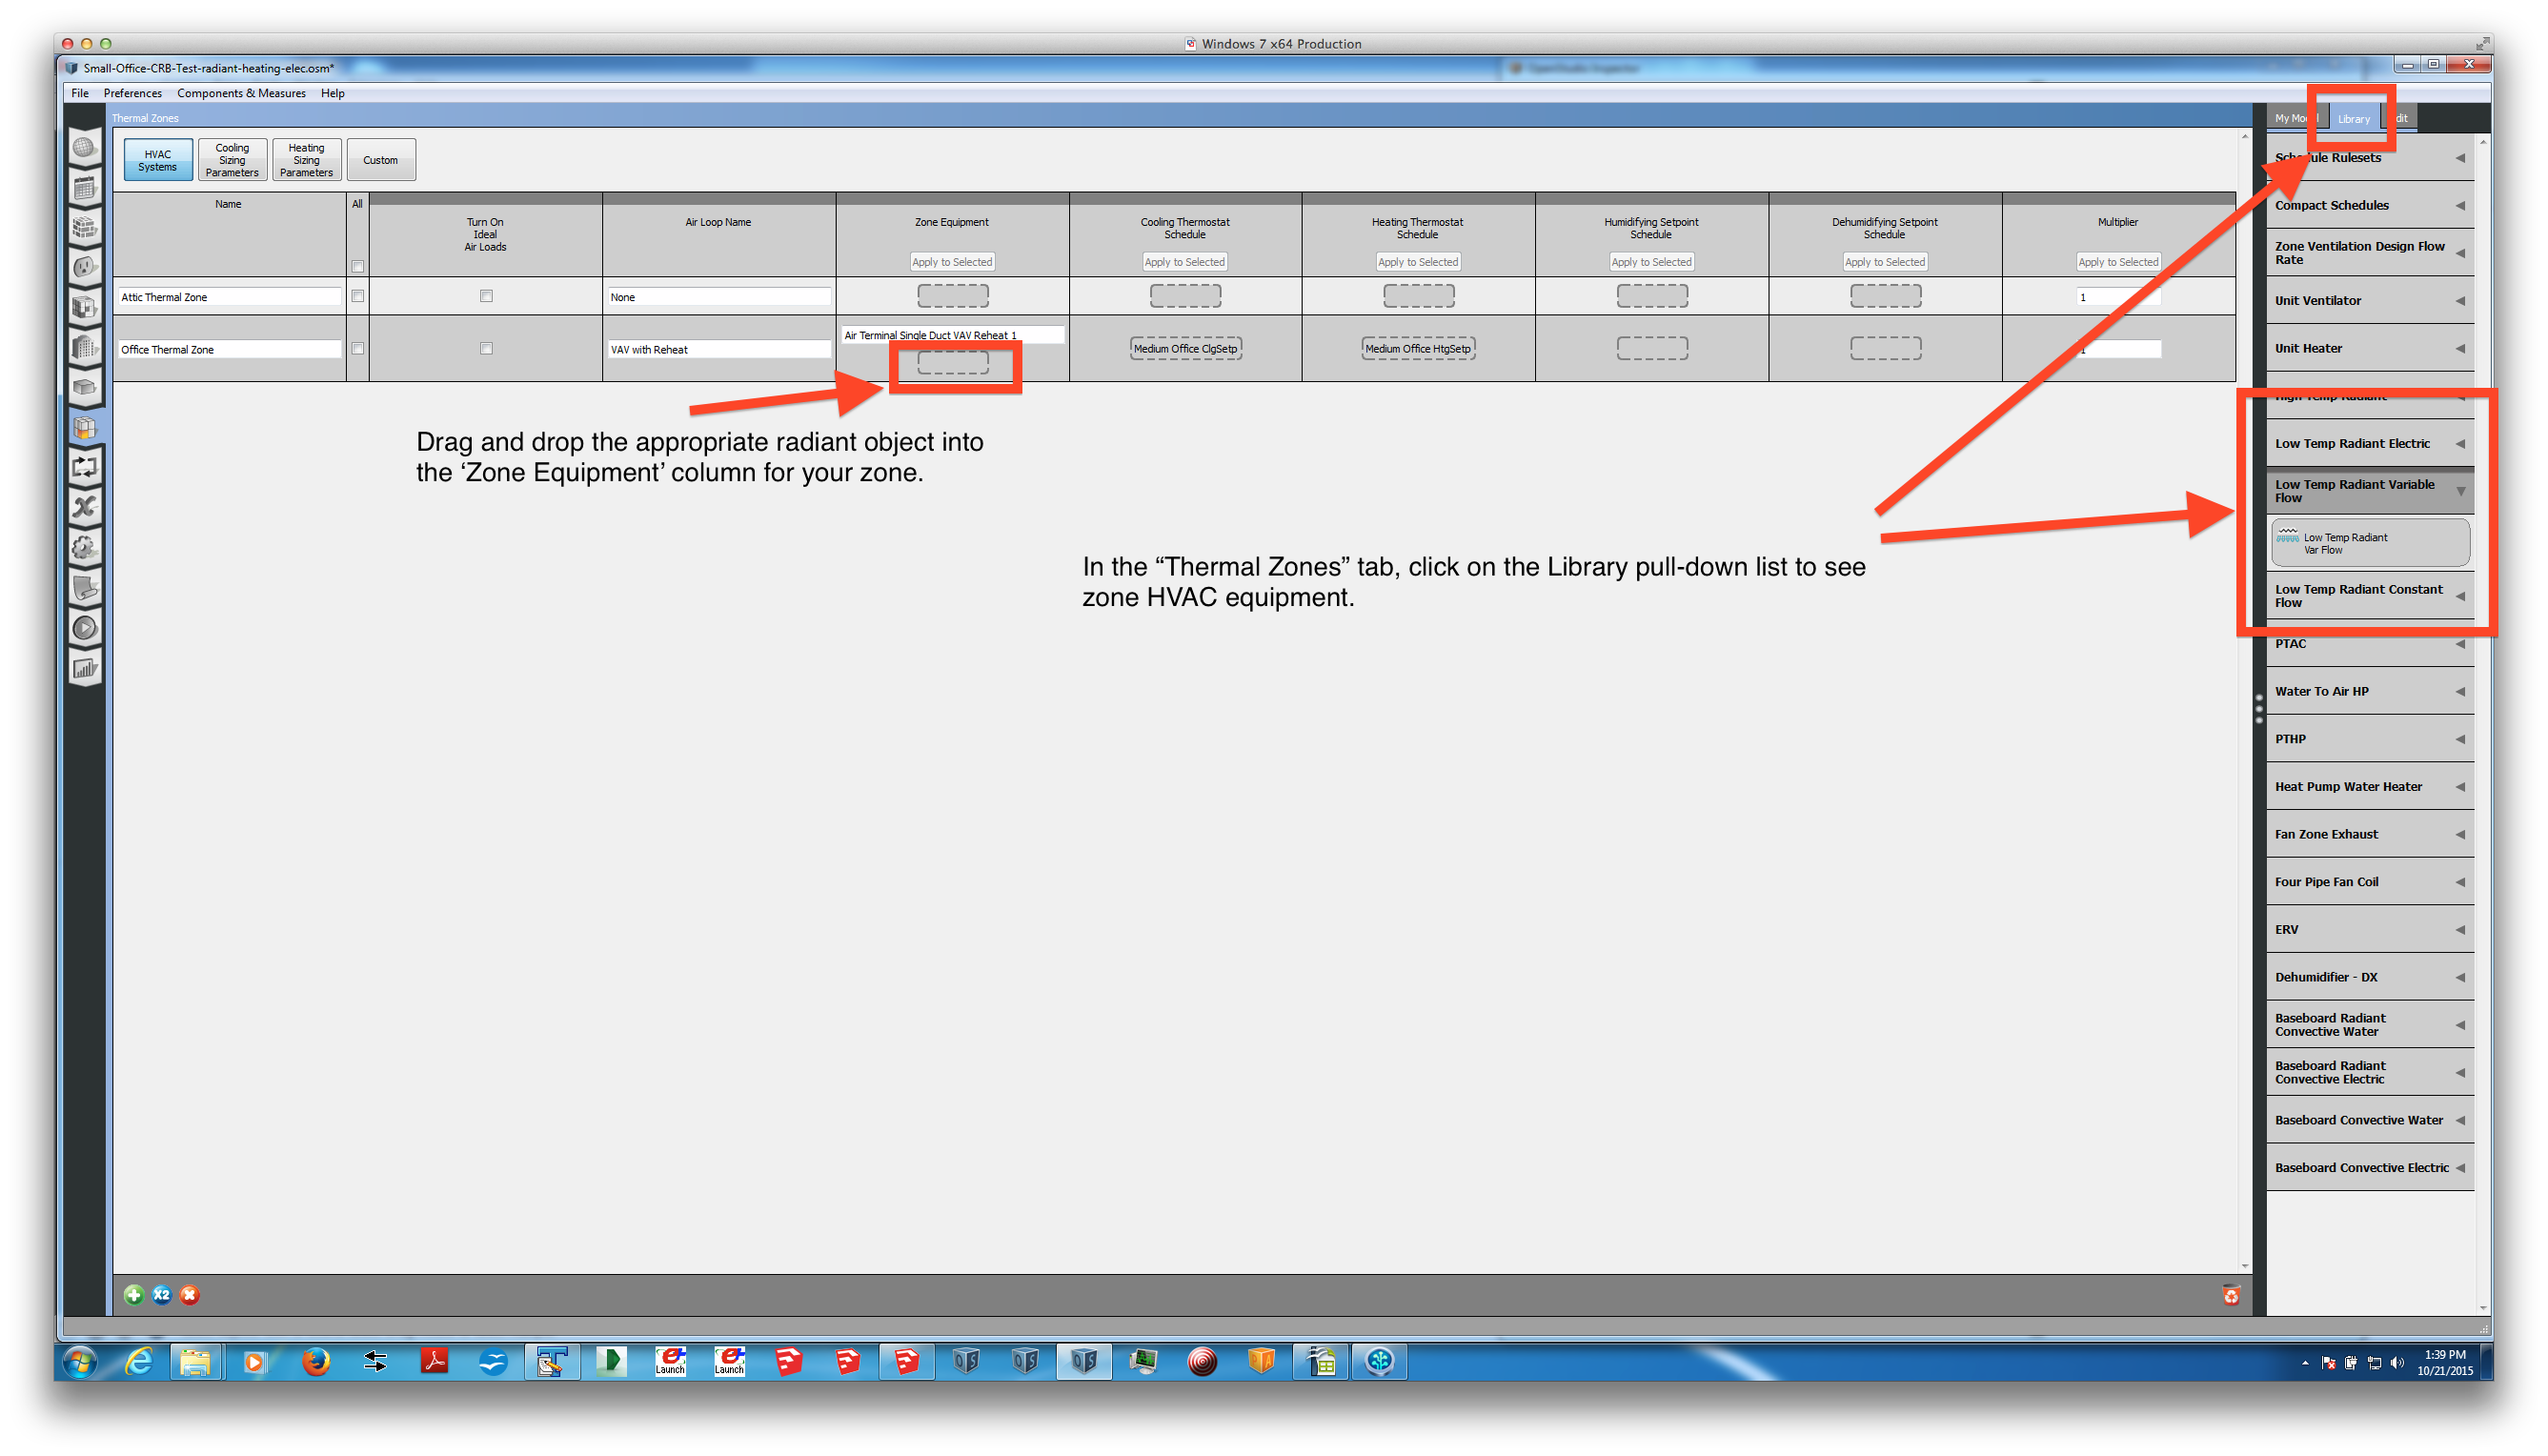
- In the 'Thermal Zones' tab of the OpenStudio interface, click on the 'Library' pull-down list at the right of the screen. You should see various radiant options near the middle (Low Temp Radiant Electric, Variable Flow, and Constant Flow). Drag the appropriate radiant object into the 'Zone Equipment' column of your zone(s) with radiant heating.
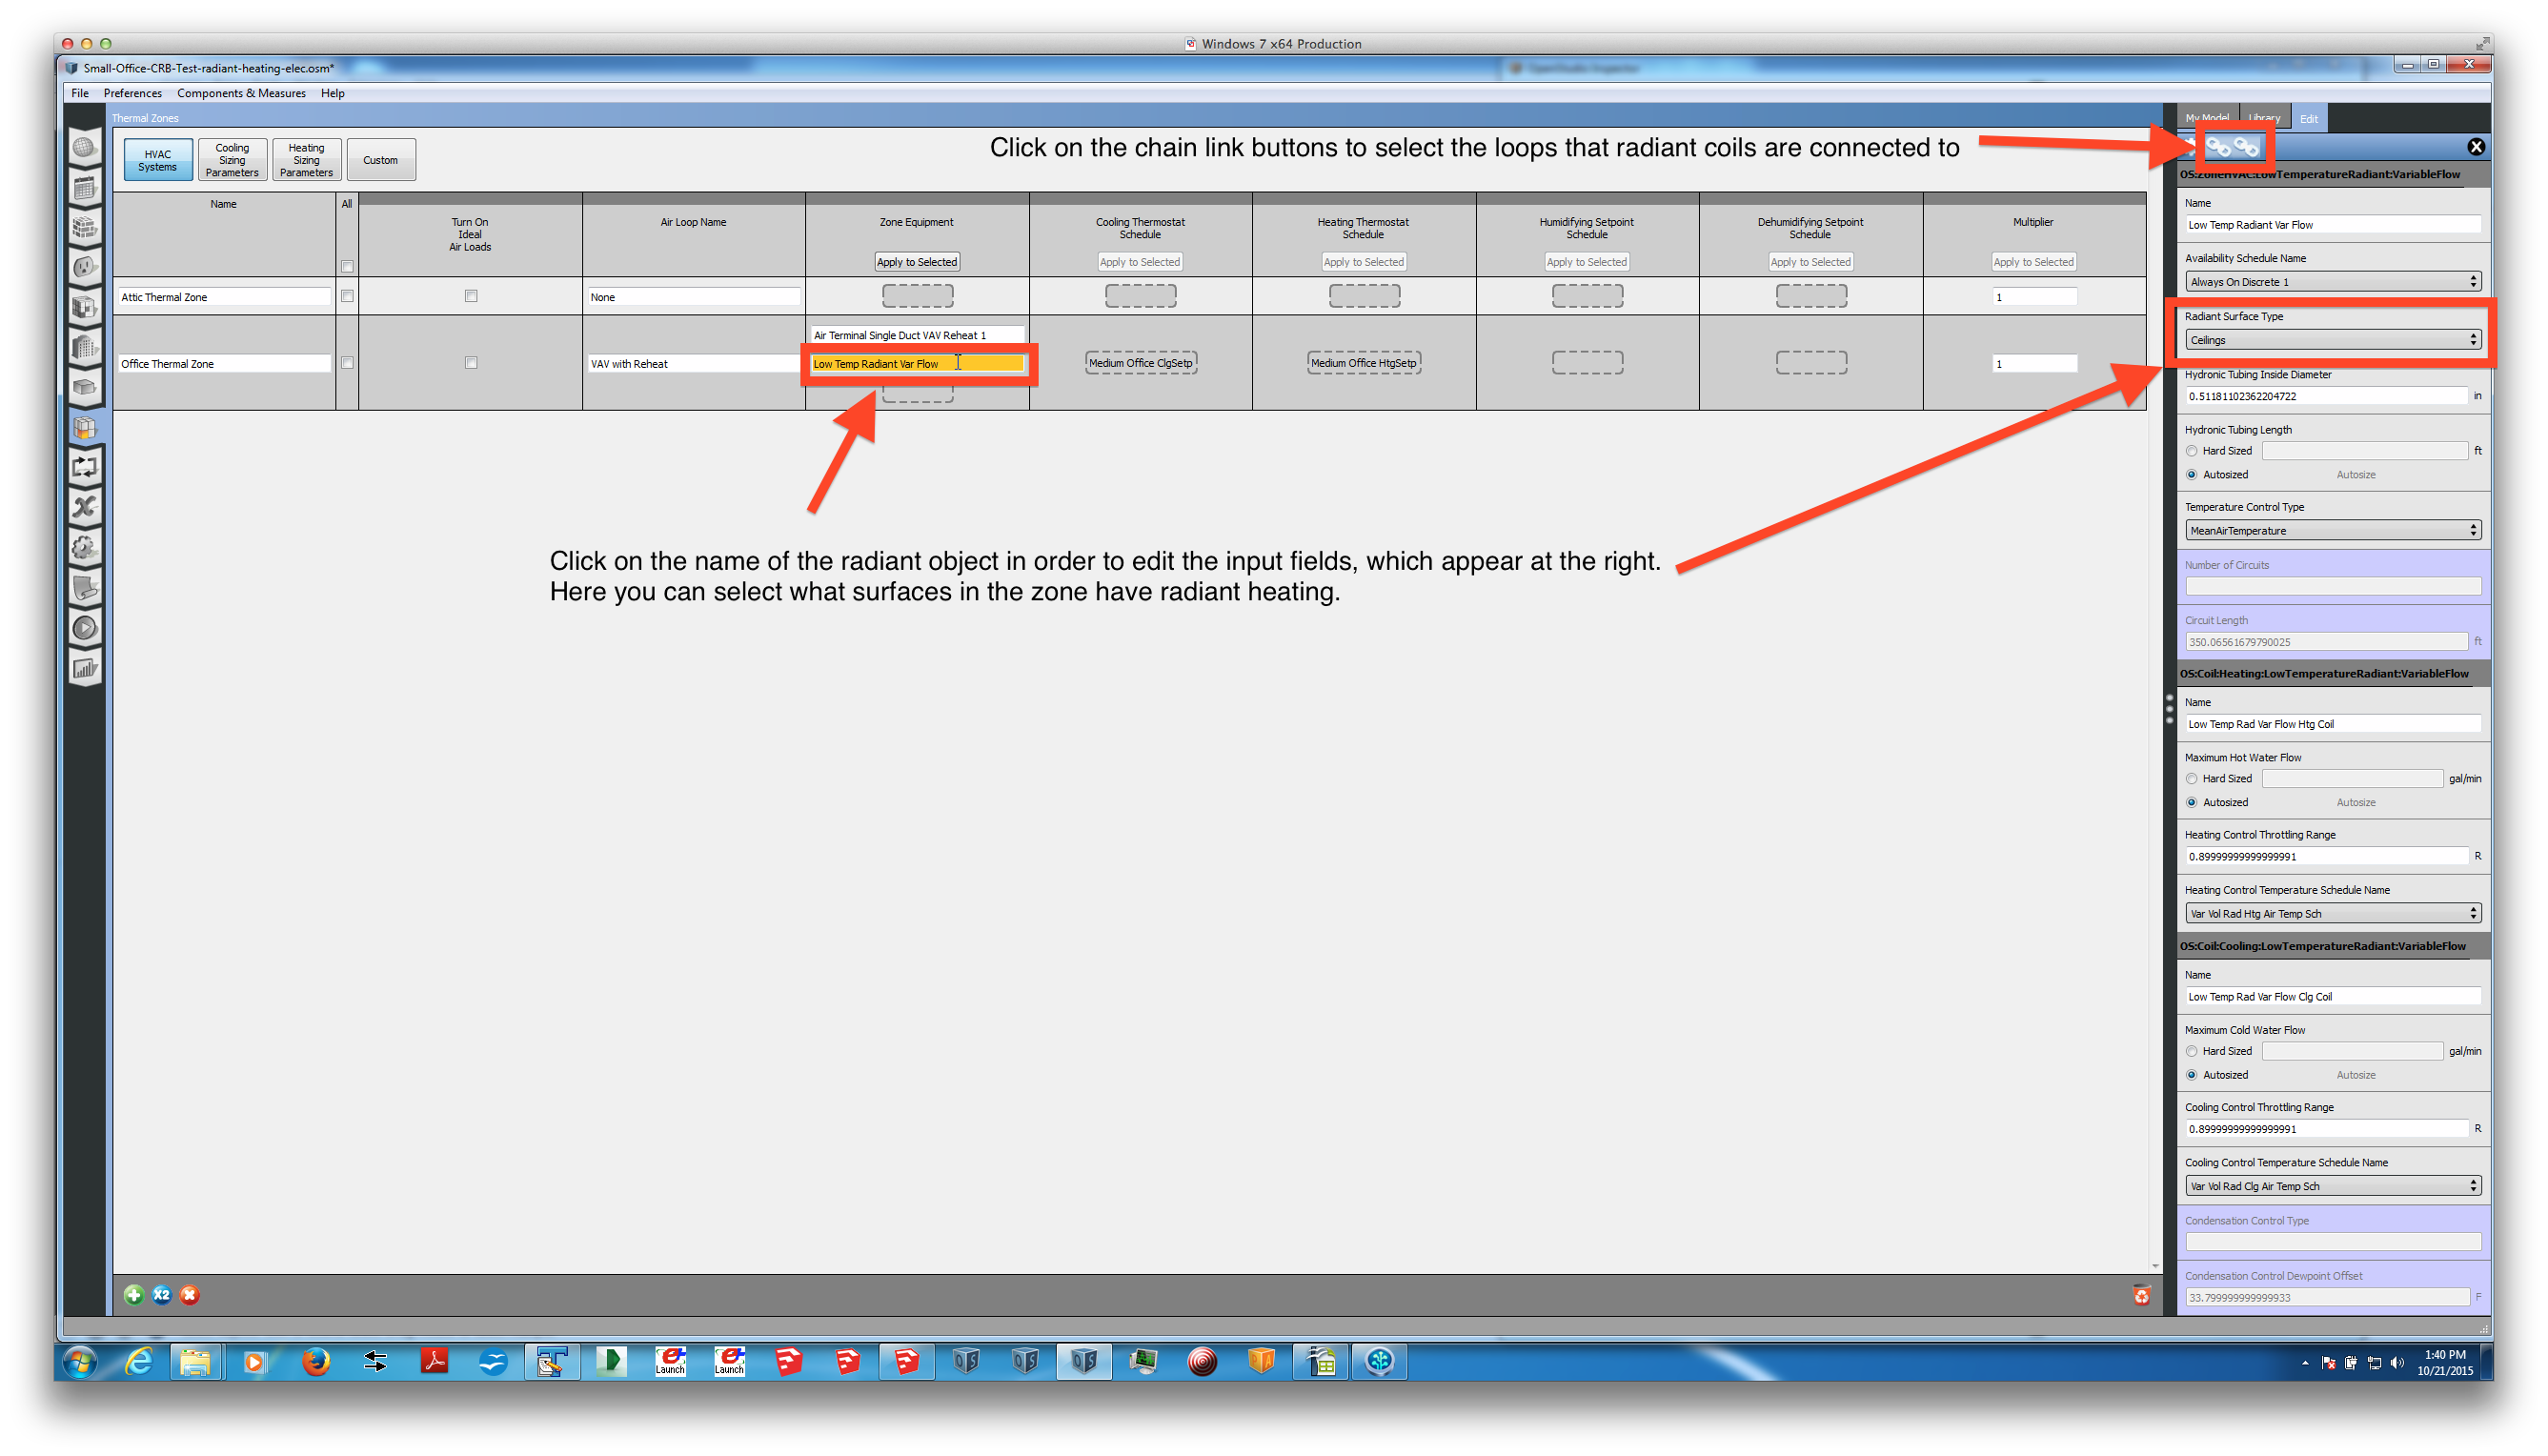
- Once created, click on the line with the name of your radiant object. You should see input fields appear at the right of the screen. Here, you can choose the 'Radiant Surface Type' to be "Floors". Be sure to also assign the appropriate hot water loop and chilled water loop that the radiant floor's heating and cooling coils are connected to, respectively. You can do this by clicking on the icons that look like connected chain links.
I tried to outline this process using the figures below. I hope this helps!