Question-and-Answer Resource for the Building Energy Modeling Community
First time here? Check out the Help page!
| | 1 | initial version |
I believe this is the case for any schedule. A step-by-step:
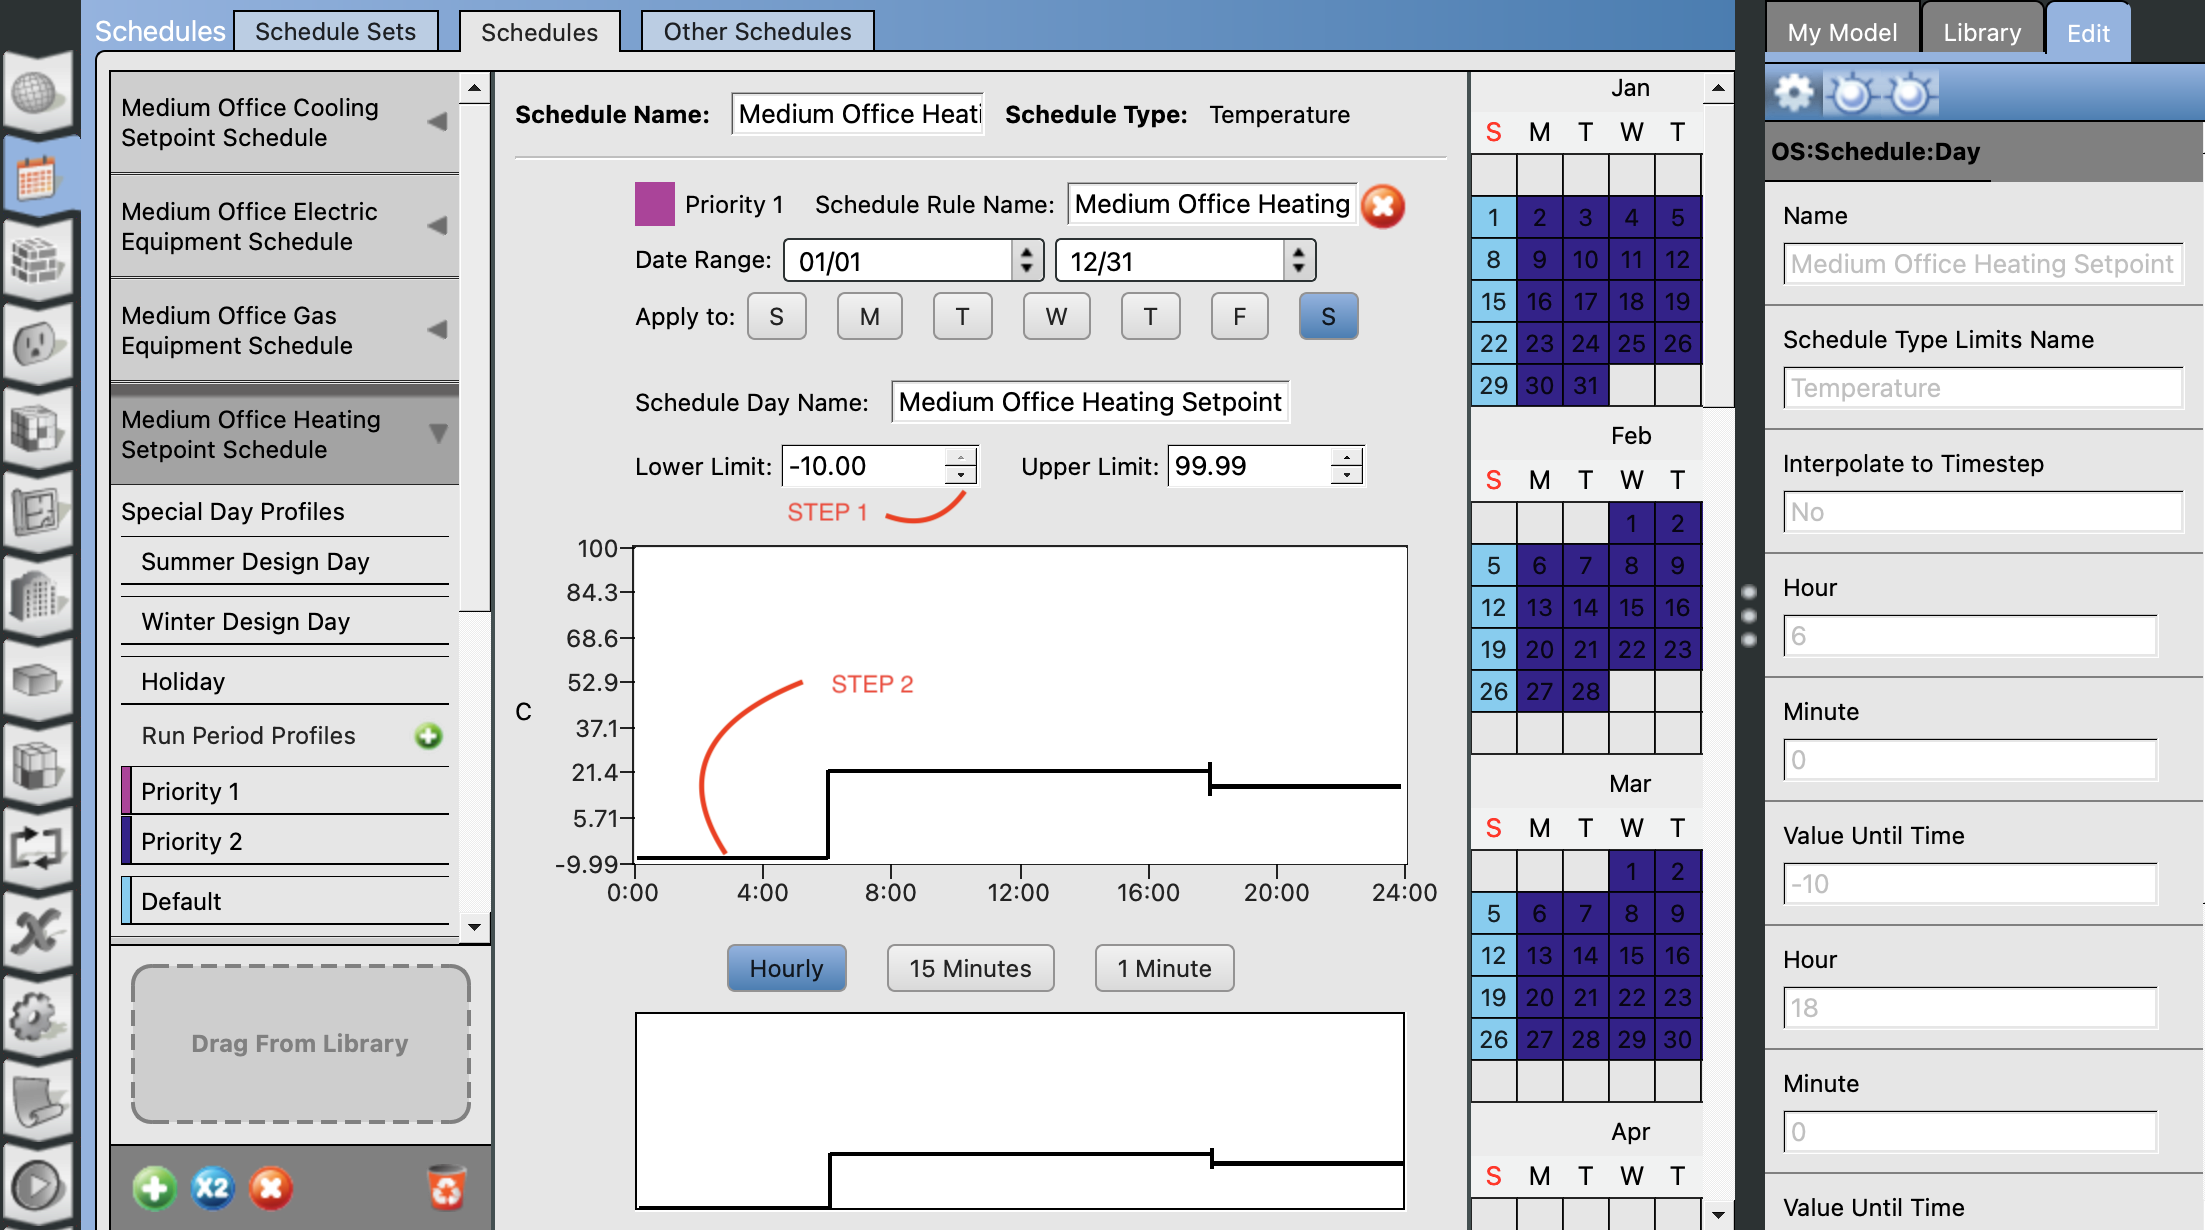
You should be able to navigate elsewhere (e.g. to another tab), then return back to the modified schedule.
| | 2 | No.2 Revision |
I believe this is the case for any schedule. A step-by-step:
You should be able to navigate elsewhere (e.g. to another tab), then return back to the modified schedule.
EDIT : Thanks for sharing the .osm file. I had no difficulty adjusting the scheduled setpoint temperatures below 0°C.
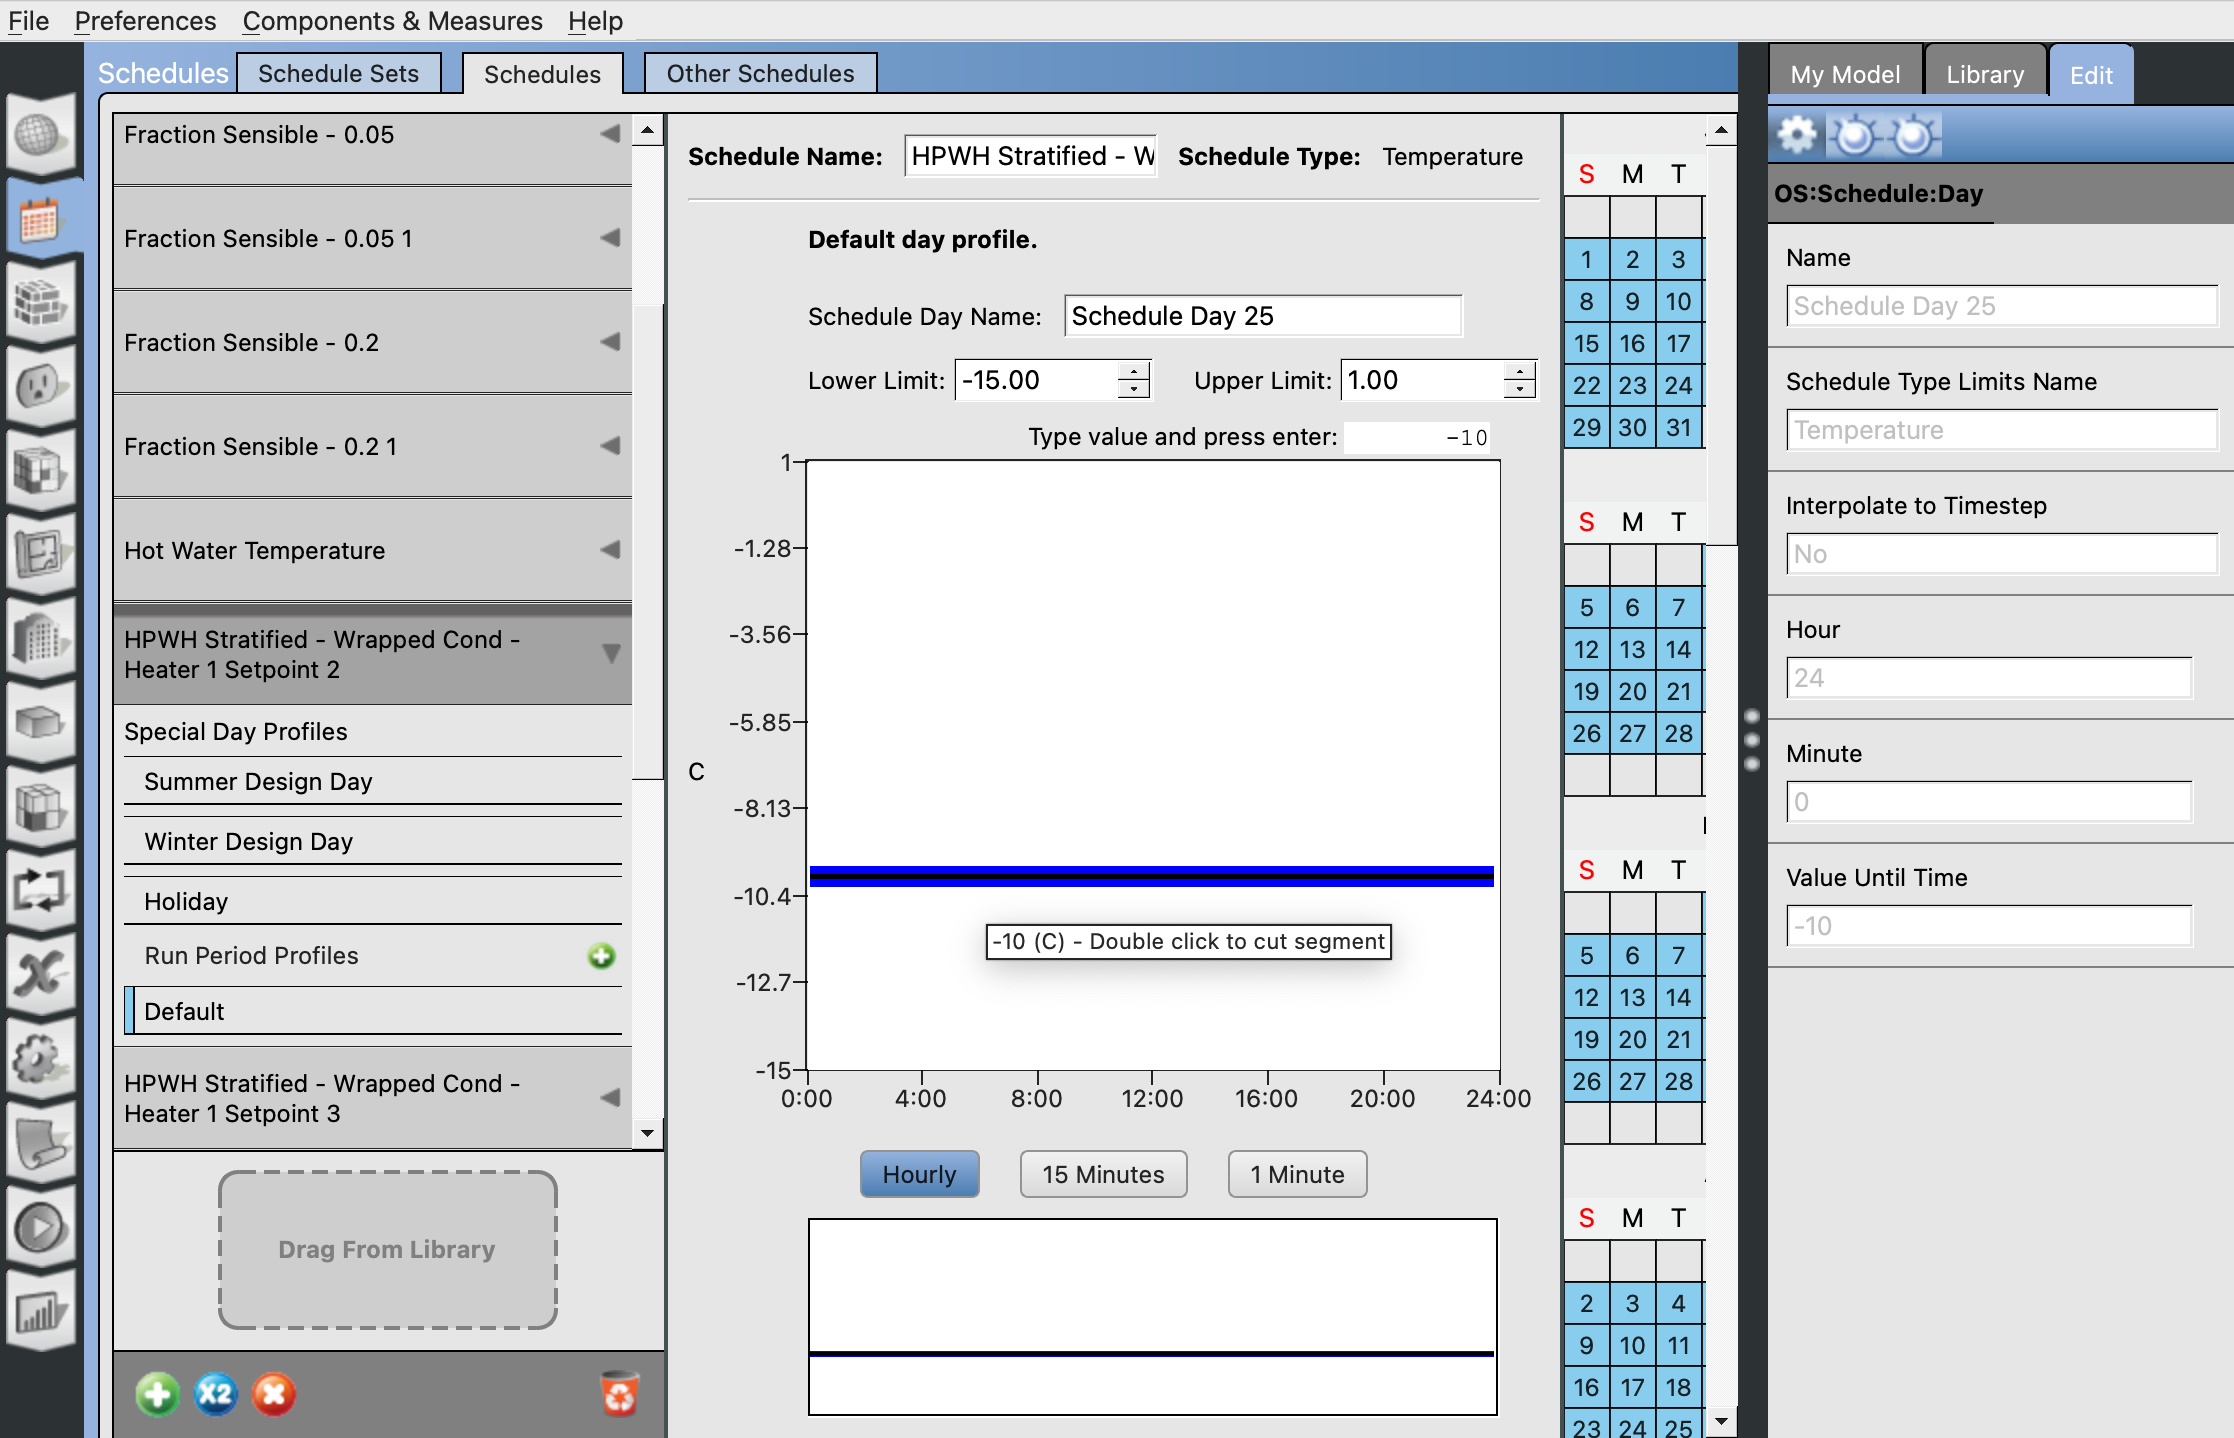
Using OpenStudio Application 1.9.0-rc1 on MacOS 15.5 (latest).
| | 3 | No.3 Revision |
I believe this is the case for any schedule. A step-by-step:
You should be able to navigate elsewhere (e.g. to another tab), then return back to the modified schedule.
EDIT : Thanks for sharing the .osm file. I had no difficulty adjusting the scheduled setpoint temperatures below 0°C.
Using OpenStudio Application 1.9.0-rc1 on MacOS 15.5 (latest).

